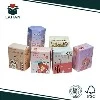
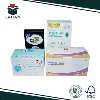
As a seasoned supplier of Custom Printed Boxes, I've had the privilege of working on a diverse range of projects, each with its unique requirements and challenges. One of the most common concerns I encounter from clients is how to design a custom printed box that is not only visually appealing but also easy to assemble. In this blog post, I'll share my insights and best practices on this topic, drawing from my years of experience in the industry.
Understanding the Basics of Box Assembly
Before diving into the design process, it's essential to have a solid understanding of the basic principles of box assembly. Most custom printed boxes are made from a single sheet of cardboard or paperboard that is cut, scored, and folded to form the desired shape. The key to easy assembly lies in designing a box that can be folded and glued or taped together without the need for complex tools or techniques.
One of the first things to consider is the type of box you want to create. There are several common types of boxes, including regular slotted containers (RSCs), half-slotted containers (HSCs), and full-overlap containers (FOCs). Each type has its own unique assembly requirements, so it's important to choose the one that best suits your needs.
RSCs are the most common type of box and are typically used for shipping and storage. They are easy to assemble and can be folded flat for storage when not in use. HSCs are similar to RSCs but have a shorter top flap, making them ideal for products that need to be easily accessible. FOCs, on the other hand, have a full-overlap design that provides extra strength and protection, making them suitable for heavy or fragile items.
Designing for Easy Assembly
Once you've chosen the type of box you want to create, it's time to start designing it for easy assembly. Here are some key considerations to keep in mind:
Simplify the Design
The simpler the design of your box, the easier it will be to assemble. Avoid using complex shapes or intricate details that may require additional steps or tools to assemble. Instead, opt for a clean, straightforward design that can be easily folded and glued or taped together.
Use Clear Scoring and Cutting Lines
Scoring and cutting lines are essential for ensuring that your box can be easily folded and assembled. Make sure that these lines are clear and easy to see, and that they are accurately placed on the box design. You may also want to consider using a scoring machine or a sharp knife to ensure that the lines are straight and precise.


Incorporate Assembly Instructions
Even if your box design is relatively simple, it's still a good idea to include assembly instructions on the box itself. This can help to ensure that your customers are able to assemble the box correctly and without any confusion. You can include the instructions directly on the box design or on a separate sheet of paper that is included with the box.
Choose the Right Materials
The materials you choose for your box can also have a significant impact on its ease of assembly. Make sure that you choose a material that is strong enough to hold your product but also flexible enough to be easily folded and assembled. You may also want to consider using a material that is pre-scored or pre-cut to make the assembly process even easier.
Adding Custom Printing to Your Box
Once you've designed your box for easy assembly, it's time to add custom printing to it. Custom printing can help to make your box stand out from the competition and can also provide important information about your product or brand. Here are some tips for adding custom printing to your box:
Choose the Right Printing Method
There are several different printing methods available for custom printed boxes, including digital printing, offset printing, and flexographic printing. Each method has its own advantages and disadvantages, so it's important to choose the one that best suits your needs.
Digital printing is a popular choice for small quantities or short-run printing jobs. It offers high-quality printing results and can be used to print on a variety of materials. Offset printing, on the other hand, is a more traditional printing method that is ideal for large quantities or long-run printing jobs. It offers excellent color accuracy and can be used to print on a wide range of materials. Flexographic printing is a cost-effective printing method that is commonly used for printing on corrugated cardboard. It offers fast printing speeds and can be used to print on a variety of materials.
Use High-Quality Graphics and Images
The graphics and images you use on your box can have a significant impact on its overall appearance. Make sure that you use high-quality graphics and images that are clear, sharp, and visually appealing. You may also want to consider using a professional graphic designer to create your box design and graphics.
Consider the Placement of Your Printing
The placement of your printing on the box can also affect its ease of assembly. Make sure that you place your printing in a location that does not interfere with the folding or gluing of the box. You may also want to consider using a spot color or a clear coating to protect your printing from damage during the assembly process.
Testing Your Box Design
Before you start producing your custom printed boxes in large quantities, it's important to test your box design to ensure that it is easy to assemble and meets your requirements. Here are some steps you can take to test your box design:
Create a Prototype
The first step in testing your box design is to create a prototype. You can use a variety of materials to create a prototype, including cardboard, paperboard, or even plastic. Make sure that your prototype is an accurate representation of your final box design and that it includes all of the necessary features and details.
Assemble the Prototype
Once you've created your prototype, it's time to assemble it. Follow the assembly instructions that you've included on the box design and make note of any difficulties or challenges that you encounter. You may also want to ask someone else to assemble the prototype to get a second opinion.
Evaluate the Results
After you've assembled the prototype, it's time to evaluate the results. Look for any areas where the assembly process could be improved, such as unclear scoring or cutting lines, difficult-to-fold corners, or problems with the gluing or taping. Make any necessary adjustments to your box design based on your evaluation.
Conclusion
Designing a custom printed box for easy assembly requires a combination of creativity, technical expertise, and attention to detail. By following the tips and best practices outlined in this blog post, you can create a box that is not only visually appealing but also easy to assemble and meets your specific requirements.
If you're interested in learning more about our Custom Printed Boxes or would like to discuss your project with one of our experts, please visit our website at Personalised Packaging Boxes, Packaging Box With Hook And PVC Window, or Branded Cardboard Boxes. We look forward to working with you!
References
- Packaging Machinery Manufacturers Institute (PMMI). (n.d.). Box Assembly Basics. Retrieved from [PMMI website]
- Corrugated Packaging Alliance. (n.d.). Types of Corrugated Boxes. Retrieved from [Corrugated Packaging Alliance website]
- Printing Industries of America. (n.d.). Printing Methods for Packaging. Retrieved from [Printing Industries of America website]